In this article, we will learn how to build an Android APP that supports (Internationalization and Localization) multiple languages. Language plays a crucial role in the overall interface of the app and it is great if you can append more languages to it so that you can support a wider audience. This makes your Android app more usable and a larger audience can comfortably use it.

In this tutorial, let us build an Android APP is multilingual supporting three languages Spanish, Hindi and French. The localization is done using the strings file present in the resources.
In your existing value folder, there will be a file name strings.xml, add a new string in it named thank-you. This string will work as default (i.e English), then make three new folders named values-es (i.e for Spanish), values-hi (i.e Hindi) and values-fr (i.e French) inside your resource (i.e res) folder and make an XML inside each of these folder named strings.xml. Each file represents different languages.
values-es>strings.xml
<resources>
    <string name="app_name">Multilingual App</string>
    <string name="thank_you">Gracias</string>
</resources>
values-hi>strings.xml
<resources>
    <string name="app_name">Multilingual App</string>
    <string name="thank_you">धन्यवाद</string>
</resources>
values-fr>strings.xml
<resources>
    <string name="app_name">Multilingual App</string>
    <string name="thank_you">Je vous remercie</string>
</resources>
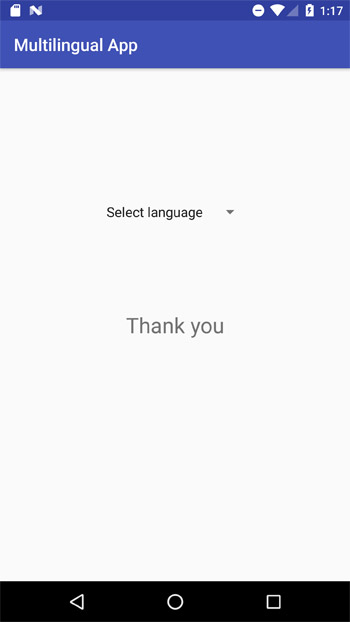
Then make an Android layout file for the activity and put a Spinner and a TextView in it. Give them unique ID. We will need it later while setting the desired position.
activity_main.xml
<?xml version="1.0" encoding="utf-8"?>
<android.support.constraint.ConstraintLayout xmlns:android="http://schemas.android.com/apk/res/android"
    xmlns:app="http://schemas.android.com/apk/res-auto"
    xmlns:tools="http://schemas.android.com/tools"
    android:layout_width="match_parent"
    android:layout_height="match_parent"
    tools:context="com.javapapers.multilingualapp.MainActivity">
    <Spinner
        android:id="@+id/spinner"
        android:layout_width="wrap_content"
        android:layout_height="wrap_content"
        app:layout_constraintLeft_toLeftOf="parent"
        app:layout_constraintRight_toRightOf="parent"
        app:layout_constraintTop_toBottomOf="@+id/guidline" />

    <TextView
        android:id="@+id/string"
        android:layout_width="wrap_content"
        android:layout_height="wrap_content"
        android:text="@string/thank_you"
        android:textSize="25sp"
        app:layout_constraintBottom_toBottomOf="parent"
        app:layout_constraintLeft_toLeftOf="parent"
        app:layout_constraintRight_toRightOf="parent"
        app:layout_constraintTop_toTopOf="parent" />

    <android.support.constraint.Guideline
        android:id="@+id/guidline"
        android:layout_width="wrap_content"
        android:layout_height="wrap_content"
        android:orientation="horizontal"
        app:layout_constraintGuide_percent="0.26" />

</android.support.constraint.ConstraintLayout>
Then we will start by making an object of Spinner which we are using to change the language. Then we make an ArrayList(i.e list ) of the languages named langList (you can name that whatever you want). Now we have to add the languages so user can choose from the list. We want our Spinner to work like a drop-down menu. We have to tell the code what to do when an item from Spinner is selected (i.e language).
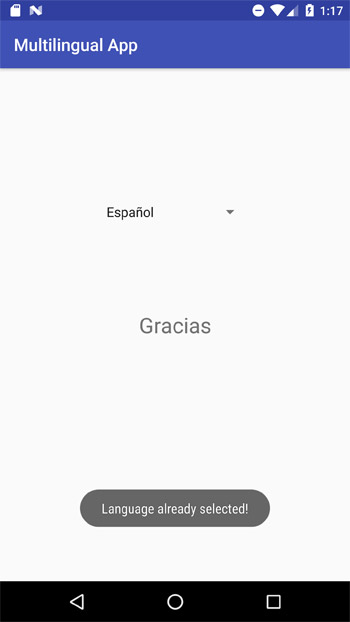
The most important portion is function setLocale(). This is the function which will change the language we are passing as a string(i.e locale we want to change to e.g. hi, es, fr ) parameter, localeName. If the Spanish language is already selected by the user, what if the user again selects the Spanish language. There, we’ll show the toast message of “Language already selected!”.
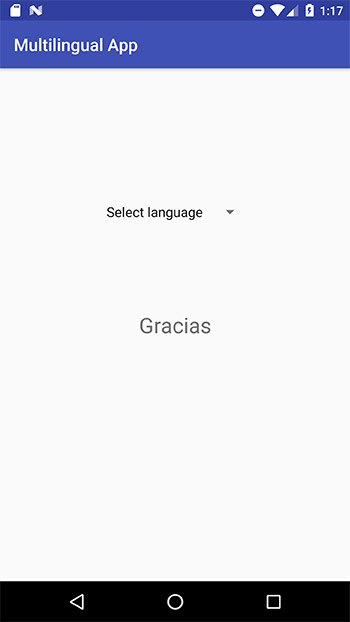
“A Locale object represents a specific geographical, political, or cultural region”. We’ll make an object of locale named as myLocaleand set the new locale to the configuration, after this we have to update our configuration and restart the activity to make a change so we are using intent
MainActivity.java
package com.javapapers.multilingualapp;

import android.content.Intent;
import android.content.res.Configuration;
import android.content.res.Resources;
import android.support.v7.app.AppCompatActivity;
import android.os.Bundle;
import android.util.DisplayMetrics;
import android.view.View;
import android.widget.AdapterView;
import android.widget.ArrayAdapter;
import android.widget.Spinner;
import android.widget.Toast;

import java.util.ArrayList;
import java.util.List;
import java.util.Locale;

public class MainActivity extends AppCompatActivity {
    Spinner spinner;
    Locale myLocale;
    String currentLanguage = "en", currentLang;

    @Override
    protected void onCreate(Bundle savedInstanceState) {
        super.onCreate(savedInstanceState);
        setContentView(R.layout.activity_main);

        currentLanguage = getIntent().getStringExtra(currentLang);

        spinner = (Spinner) findViewById(R.id.spinner);

         List<String> list = new ArrayList<String>();

        list.add("Select language");
        list.add("English");
        list.add("Español");
        list.add("Français");
        list.add("Hindi");

        ArrayAdapter<String> adapter = new ArrayAdapter<String>(this, android.R.layout.simple_spinner_item, list);
        adapter.setDropDownViewResource(android.R.layout.simple_spinner_dropdown_item);
        spinner.setAdapter(adapter);

        spinner.setOnItemSelectedListener(new AdapterView.OnItemSelectedListener() {
            @Override
            public void onItemSelected(AdapterView<?> adapterView, View view, int position, long l) {
                switch (position) {
                    case 0:
                        break;
                    case 1:
                        setLocale("en");
                        break;
                    case 2:
                        setLocale("es");
                        break;
                    case 3:
                        setLocale("fr");
                        break;
                    case 4:
                        setLocale("hi");
                        break;
                }
            }

            @Override
            public void onNothingSelected(AdapterView<?> adapterView) {
            }
        });
    }

    public void setLocale(String localeName) {
        if (!localeName.equals(currentLanguage)) {
            myLocale = new Locale(localeName);
            Resources res = getResources();
            DisplayMetrics dm = res.getDisplayMetrics();
            Configuration conf = res.getConfiguration();
            conf.locale = myLocale;
            res.updateConfiguration(conf, dm);
            Intent refresh = new Intent(this, MainActivity.class);
            refresh.putExtra(currentLang, localeName);
            startActivity(refresh);
        } else {
            Toast.makeText(MainActivity.this, "Language already selected!", Toast.LENGTH_SHORT).show();
        }
    }

    public void onBackPressed() {
        Intent intent = new Intent(Intent.ACTION_MAIN);
        intent.addCategory(Intent.CATEGORY_HOME);
        intent.setFlags(Intent.FLAG_ACTIVITY_CLEAR_TOP);
        startActivity(intent);
        finish();
        System.exit(0);
    }
}


Comments are closed for "Android App with Multi-Language Support".
Thanks for the tutorial.It’s indeed an easy to implement tutorial. But the application stays in English language only after changing the language. Can you please help me with that?!