Android Tab Layout Tutorial
Last modified on June 25th, 2014 by Joe.
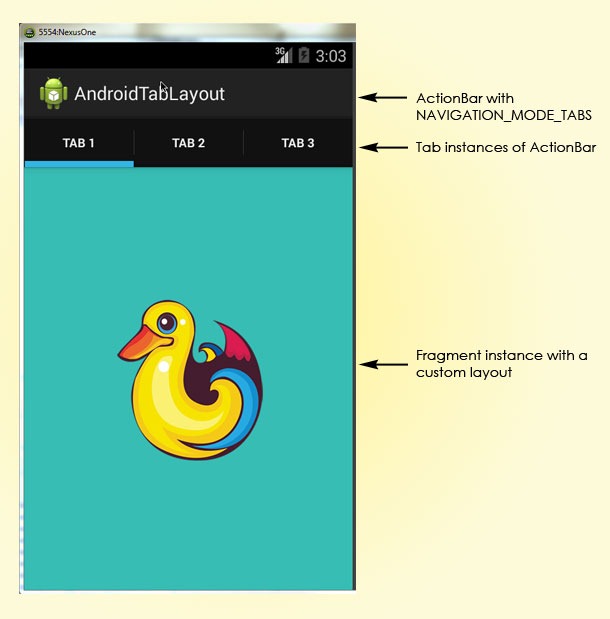
This Android tutorial is to walk you through learning tab view in Android. We will be using Fragment to display Tabs in an Android activity. TabActivity class is deprecated and it should not be used going forward. It is a simple and straight forward Android app.

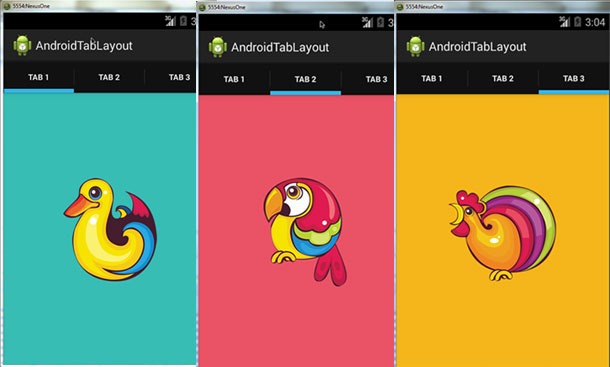
- We will create an Android app with three tabs.
- Set the ActionBar navigation mode to ActionBar.NAVIGATION_MODE_TABS.
- Get Tab instances from ActionBar.
- Let the Activity implement TabListener and set it to the Tab instance.
- Create a custom Fragment class along with a custom layout.
- onTabSelected, instantiate the custom Fragment instance and replace the content.
Android Tab Example App Source
You can download the complete project source using the link given below.
MainActivity.java
package com.javapapers.android.androidtablayout.app;
import android.app.ActionBar;
import android.app.ActionBar.Tab;
import android.app.ActionBar.TabListener;
import android.app.Activity;
import android.app.Fragment;
import android.app.FragmentTransaction;
import android.os.Bundle;
import java.util.ArrayList;
import java.util.List;

public class MainActivity extends Activity implements TabListener {

    List tabFragmentList = new ArrayList();

    @Override
    protected void onCreate(Bundle savedInstanceState) {
        super.onCreate(savedInstanceState);
        //setContentView(R.layout.activity_main);
        ActionBar actionBar = getActionBar();
        actionBar.setNavigationMode(ActionBar.NAVIGATION_MODE_TABS);

        for (int i=1; i <= 3; i++) {
            Tab tab = actionBar.newTab();
            tab.setText("Tab " + i);
            tab.setTabListener(this);
            actionBar.addTab(tab);
        }
    }

    @Override
    public void onTabSelected(Tab tab, FragmentTransaction ft) {
        Fragment fragment = null;
        TabFragment tabFragment = null;

        if (tabFragmentList.size() > tab.getPosition()) {
            fragment = tabFragmentList.get(tab.getPosition());
        }

        if (fragment == null) {
            tabFragment = new TabFragment();
            Bundle bundle = new Bundle();
            int imgResId = 0;
            int colorResId = 0;
            if(tab.getPosition()==0){
                imgResId = getResources().getIdentifier("duck", "drawable",
                        "com.javapapers.android.androidtablayout.app");
                colorResId = R.color.color1;
            } else if (tab.getPosition()==1){
                imgResId = getResources().getIdentifier("parrot", "drawable",
                        "com.javapapers.android.androidtablayout.app");
                colorResId = R.color.color2;
            } else if(tab.getPosition()==2){
                imgResId = getResources().getIdentifier("cock", "drawable",
                        "com.javapapers.android.androidtablayout.app");
                colorResId = R.color.color3;
            }
            bundle.putInt("image", imgResId);
            bundle.putInt("color", colorResId);
            tabFragment.setArguments(bundle);
            tabFragmentList.add(tabFragment);
        }
        else {
            tabFragment = (TabFragment) fragment;
        }
        ft.replace(android.R.id.content, tabFragment);
    }

    @Override
    public void onTabUnselected(Tab tab, FragmentTransaction ft) {
        if (tabFragmentList.size() > tab.getPosition()) {
            ft.remove(tabFragmentList.get(tab.getPosition()));
        }
    }

    @Override
    public void onTabReselected(Tab tab, FragmentTransaction ft) {  }
}
TabFragment.java
package com.javapapers.android.androidtablayout.app;
import android.app.Fragment;
import android.os.Bundle;
import android.view.LayoutInflater;
import android.view.View;
import android.view.ViewGroup;
import android.widget.ImageView;
public class TabFragment extends Fragment {

    private int image;
    private int color;

    @Override
    public void onCreate(Bundle savedInstanceState) {
        super.onCreate(savedInstanceState);
        Bundle bundle = getArguments();
        image = bundle.getInt("image");
        color = bundle.getInt("color");
    }

    @Override
    public View onCreateView(LayoutInflater inflater, ViewGroup container,
                             Bundle savedInstanceState) {
        View view = inflater.inflate(R.layout.fragment_tab, null);
        ImageView tabImage = (ImageView) view.findViewById(R.id.imageView);
        tabImage.setImageResource(image);
        view.setBackgroundResource(color);
        return view;
    }
}
activity_main.xml
<RelativeLayout xmlns:android="http://schemas.android.com/apk/res/android"
    xmlns:tools="http://schemas.android.com/tools"
    android:layout_width="match_parent"
    android:layout_height="match_parent"
    android:paddingBottom="@dimen/activity_vertical_margin"
    android:paddingLeft="@dimen/activity_horizontal_margin"
    android:paddingRight="@dimen/activity_horizontal_margin"
    android:paddingTop="@dimen/activity_vertical_margin"
    tools:context=".MainActivity" >
</RelativeLayout>
fragment_tab.xml
<?xml version="1.0" encoding="utf-8"?>
<RelativeLayout xmlns:android="http://schemas.android.com/apk/res/android"
    android:layout_width="match_parent"
    android:layout_height="match_parent"
    android:orientation="vertical" >
    <ImageView
        android:layout_width="wrap_content"
        android:layout_height="wrap_content"
        android:id="@+id/imageView"
        android:layout_centerVertical="true"
        android:layout_centerInParent="true" />
</RelativeLayout>
AndroidManifest.xml
<?xml version="1.0" encoding="utf-8"?>
<manifest xmlns:android="http://schemas.android.com/apk/res/android"
    package="com.javapapers.android.androidtablayout.app" >
    <application
        android:allowBackup="true"
        android:icon="@drawable/ic_launcher"
        android:label="@string/app_name"
        android:theme="@style/AppTheme" >
        <activity
            android:name="com.javapapers.android.androidtablayout.app.MainActivity"
            android:label="@string/app_name" >
            <intent-filter>
                <action android:name="android.intent.action.MAIN" />
                <category android:name="android.intent.category.LAUNCHER" />
            </intent-filter>
        </activity>
    </application>
</manifest>

Download Android Tab Layout Source
AndroidTabLayout App Project Source
Comments on "Android Tab Layout Tutorial"
Comments are closed for "Android Tab Layout Tutorial".


What should we do for dynamic tabs?
[…] the previous tutorial we saw about Tab layout in Android. It will be nice to have this swipe views in the tab layout. In the next tutorial, we will see how […]
[…] a previous tutorial we saw about creating a tab layout in an Android application. In an another tutorial we saw about creating swipe views in Android. Now all we are going to do is […]
Bon tutoriel. ça m’a aidé beaucoup.
Thank’s so much!
Shitty tutorial. Next time explain it well
How can we Customize Tab Property like selected tab color & background…