Android Flashlight Application Tutorial
In this Android tutorial let us learn about how to create a nice small Android app which will help double your Android device as a flashlight too. It would be handy to have this flashlight app in our Android phone. Instead of downloading an app from the Google play store, wouldn’t it be nice if we develop it ourselves.

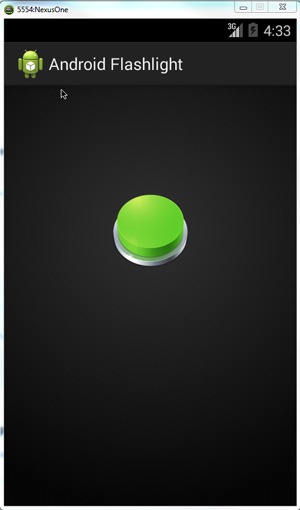
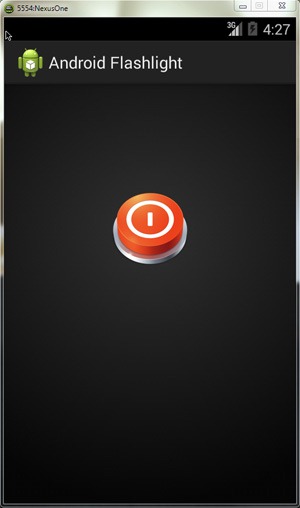
This is a simple app, all we are going to do is control the camera’s flashlight. In our app we will have a toggle switch to On and Off the camera flash. That’s it.
Step 1: Permission to use Camera
In the Android manifest file, add two lines as below to get permission for the app to use the device camera.
<?xml version="1.0" encoding="utf-8"?>
<manifest xmlns:android="http://schemas.android.com/apk/res/android"
    package="com.javapapers.android.androidflashlight.app" >

    <uses-permission android:name="android.permission.CAMERA" />
    <uses-feature android:name="android.hardware.camera" />

    <application
        android:allowBackup="true"
        android:icon="@drawable/ic_launcher"
        android:label="@string/app_name"
        android:theme="@style/AppTheme" >
        <activity
            android:name="com.javapapers.android.androidflashlight.app.FlashlightActivity"
            android:label="@string/app_name" >
            <intent-filter>
                <action android:name="android.intent.action.MAIN" />

                <category android:name="android.intent.category.LAUNCHER" />
            </intent-filter>
        </activity>
    </application>
</manifest>

Step 2: Flashlight Control Layout
The layout will have one toggle switch which will control the flashlight on and off state. We will use two different image for on and off state. You can take it from the download zip file link give below.
<RelativeLayout xmlns:android="http://schemas.android.com/apk/res/android"
    xmlns:tools="http://schemas.android.com/tools"
    android:layout_width="match_parent"
    android:layout_height="match_parent"
    android:paddingLeft="@dimen/activity_horizontal_margin"
    android:paddingRight="@dimen/activity_horizontal_margin"
    android:paddingTop="@dimen/activity_vertical_margin"
    android:paddingBottom="@dimen/activity_vertical_margin"
    android:background="@drawable/light_control_background"
    tools:context="com.javapapers.android.androidflashlight.app.FlashlightActivity">
    <ImageButton
        android:id="@+id/flashlightSwitch"
        android:layout_width="wrap_content"
        android:layout_height="wrap_content"
        android:layout_centerHorizontal="true"
        android:layout_marginTop="100dip"
        android:src="@drawable/light_off"
        android:background="@null"
        android:contentDescription="@null"
        />
</RelativeLayout>
Step 3: Android Activity
Important steps in the activity are,
- check if camera is present in the device before proceeding
- Instantiate Camera and get its parameters
- Toggle the Camera’s flashlight state using its parameter FlashMode (FLASH_MODE_TORCH | FLASH_MODE_OFF)
package com.javapapers.android.androidflashlight.app;
import android.os.Bundle;
import android.app.Activity;
import android.app.AlertDialog;
import android.content.DialogInterface;
import android.content.pm.PackageManager;
import android.hardware.Camera;
import android.hardware.Camera.Parameters;
import android.view.View;
import android.widget.ImageButton;

public class FlashlightActivity extends Activity {

    private Camera camera;
    ImageButton flashlightSwitchImg;
    private boolean isFlashlightOn;
    Parameters params;

    @Override
    protected void onCreate(Bundle savedInstanceState) {
        super.onCreate(savedInstanceState);
        setContentView(R.layout.activity_flashlight);

        // flashlight on off Image
        flashlightSwitchImg = (ImageButton) findViewById(R.id.flashlightSwitch);

        boolean isCameraFlash = getApplicationContext().getPackageManager()
                .hasSystemFeature(PackageManager.FEATURE_CAMERA_FLASH);

        if (!isCameraFlash) {
            showNoCameraAlert();
        } else {
            camera = Camera.open();
            params = camera.getParameters();
        }

        flashlightSwitchImg.setOnClickListener(new View.OnClickListener() {
            @Override
            public void onClick(View v) {
                if (isFlashlightOn) {
                    setFlashlightOff();
                } else {
                    setFlashlightOn();
                }
            }
        });
    }

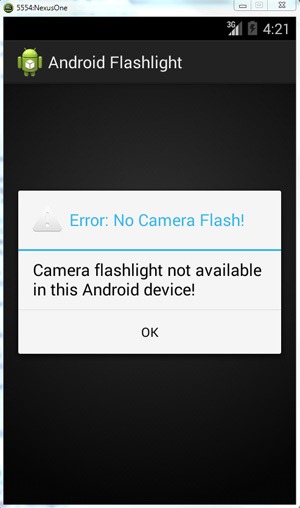
    private void showNoCameraAlert(){
        new AlertDialog.Builder(this)
                .setTitle("Error: No Camera Flash!")
                .setMessage("Camera flashlight not available in this Android device!")
                .setPositiveButton(android.R.string.yes, new DialogInterface.OnClickListener() {
                    public void onClick(DialogInterface dialog, int which) {
                        finish(); // close the Android app
                    }
                })
                .setIcon(android.R.drawable.ic_dialog_alert)
                .show();
        return;
    }
    private void setFlashlightOn() {
       params = camera.getParameters();
       params.setFlashMode(Parameters.FLASH_MODE_TORCH);
       camera.setParameters(params);
       camera.startPreview();
       isFlashlightOn = true;
       flashlightSwitchImg.setImageResource(R.drawable.light_on);
    }

    private void setFlashlightOff() {
        params.setFlashMode(Parameters.FLASH_MODE_OFF);
        camera.setParameters(params);
        camera.stopPreview();
        isFlashlightOn = false;
        flashlightSwitchImg.setImageResource(R.drawable.light_off);
    }

    @Override
    protected void onStop() {
        super.onStop();
        if (camera != null) {
            camera.release();
            camera = null;
        }
    }
}

Download the Android Flashlight Application
Comments on "Android Flashlight Application Tutorial"
Comments are closed for "Android Flashlight Application Tutorial".


Best all in one java blog ever.
Hello thanks a lot for this tutorial , I completed the whole process exactly, as described i do not have any kind of errors also i managed to solve all the errors. However when ever i lunch the appilcation the camera light does not turn on the button on the screen activity changes from red to green. What might be the problem and could you help solve it. ? Thanks
The image in the activity changes from red to green. But the camera flashlight is not switching on. Is my understanding of your problem right? Can you check and paste the log if you get any errors.
Thanks Ashwin.
Nice tutorial, thanks!!
I tried it on multiple Android devices and works very well
except on my Motorola Atrix 2
Any tips?
nice to start Android!
Hi joe,
Nice Tutorial,
But I wont’s update in its .I Try to Blinking Flash Light means (on-of Continually).
Please Help me.
Thanks
Virat