Android Development Environment Setup
This article is a recap and will provide detailed step by step instructions to setup the Android development environment. Long back I wrote a tutorial for Android Hello World. In that tutorial, I gave an overview for setting up the Android development environment. Looks like that is not detailed enough, since I still get lot of questions on how to setup the android development environment. If you have already got your setup done, this tutorial has got nothing new.
Steps for Environment Setup
- Install JDK
- Setup Eclipse IDE
- Install Android SDK (Manager)
- Install Android ADT Eclipse Plugin
- Install Android Packages
- Android Virtual Device Manager Setup
1. Install JDK
JRE alone is not sufficient, we should have the JDK setup done. Lets download and install latest version of JDK. No harm in having latest version of software.
Java Platform, Standard Edition is what we should have. We need not have NetBeans as we are going to use Eclipse. After installation its better to set the Path variable.
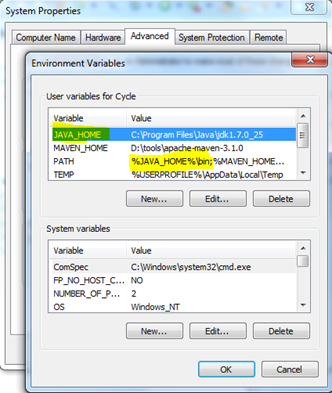
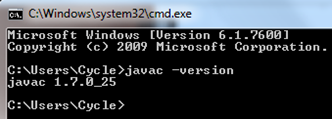
If the JDK setup is done successfully, we should get the following in command prompt,
2. Setup Eclipse IDE
Eclipse comes in a zip file. All we need to do is, download the right package and just unzip it to a location in hard disk. It is better to download “Eclipse for Java EE Developers”. Even if you are not doing any EE development, download this version. Since it comes bundled with good set of plugins that might be handy in some situations.

Download the zip file bundle and unzip it.
3. Install Android SDK (Manager)
Android SDK comes bundled with Eclipse. We do not need that version, since we already have Eclipse. We need to download and install only the SDK version which is approximately 85 MB as of now.
http://developer.android.com/sdk/index.html
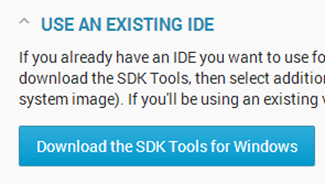
Download SDK, install – click next, next, … till Finish.
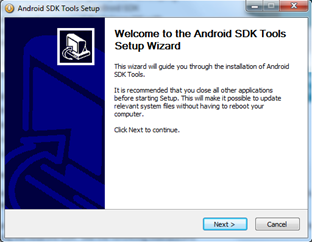
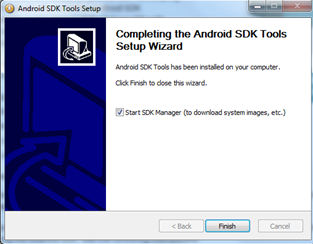
After you click ‘Finish’, this will start the SDK Manager and you will get a new window, it is to be used for packages installation. Keep that as it is, lets complete the ADT Eclipse plugin installation and come back to this.
4. Install Android ADT Eclipse Plugin
If you are in a company network, mostly you will be behind a proxy server / firewall. There might be restrictions on downloading and installing software. You need to check with your IT admin, raise request, follow up with them and get it done.

Most of the cases, IT guys will not understand the importance of these and they will talk like you are about to steal the world bank data. I know how much hell of a work it is. If you are at home, then these download and installation will be a cakewalk.
- In Eclipse, select Help > Install New Software.
- Then Click Add, enter "ADT Plugin" for Name and for Location https://dl-ssl.google.com/android/eclipse/
- Click OK and you will get the following screen.
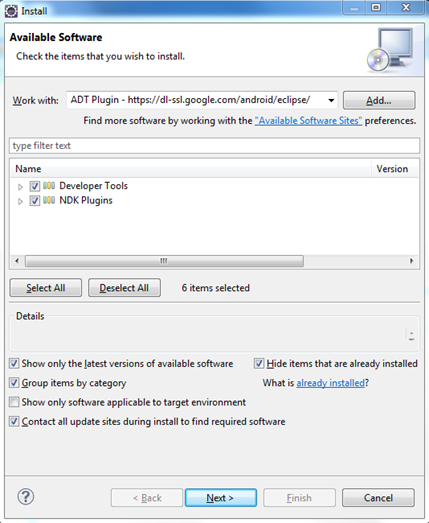
Click Next,
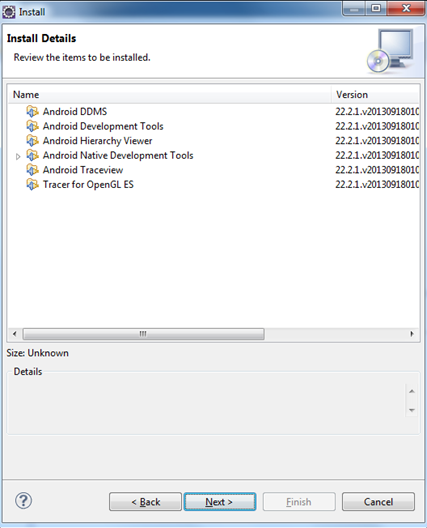
Click next and Finish.
This might take lots and lots of time, based on our internet connection speed. If you are in BSNL connection, go have a good sleep and come back later. During this install, the system firewall will ask for permission, give ok ok.
Restart Eclipse after its done and set the preferences,
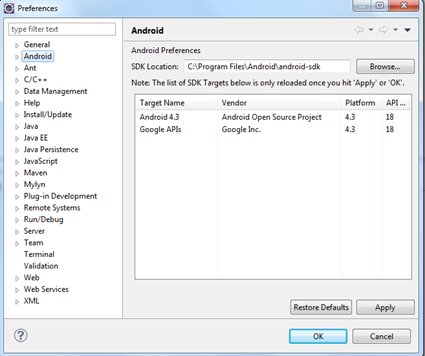
5. Install Android Packages
After installation of Android SDK Manager, we will “Start SDK Manager” and get the following screen,
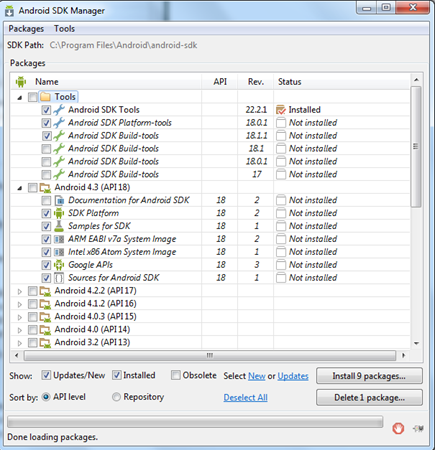
In the above screen, I have selected certain check-boxes (make sure you have minimum selected all those). Presently I am installing packages for development for Android version 4.3 (API 18). If you are going to develop for older version of Androids, then select the respective versions. If you are not sure which version to choose, just select the latest version as I have done now. On click of install, we will get below, ensure all are in green tick mark, if not select that item and ‘Accept’ license.
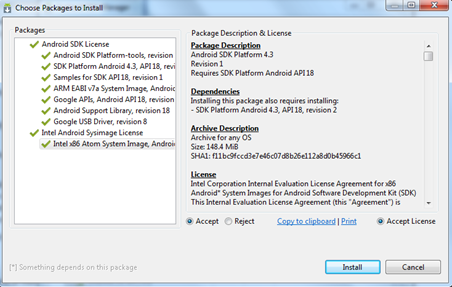
Now click ‘Install’, this is also going to take lot of time.
6. Android Virtual Device Manager Setup
This step is required to test the apps we develop within Eclipse using the Android virtual device. After Android ADT plugin installation in Eclipse, we will get couple new icons in the Eclipse toolbar. In the top left we can see those. One icon is for ‘Android Virtual Device Manager’, on click we will get the following screen,
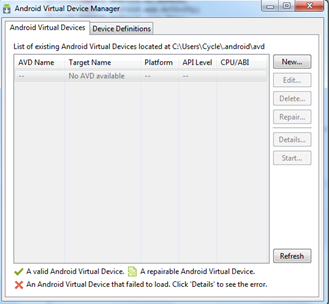
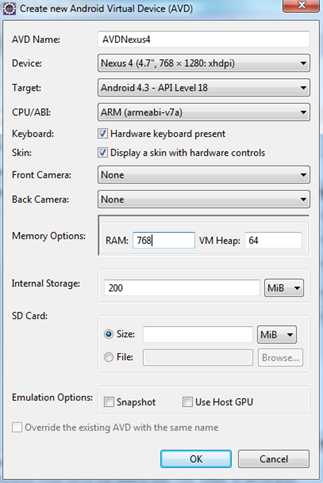
Click ‘New’, give the following configuration and Ok,
Now we are ready to create our first Android mobile application. World is going Android way, so it is good to learn Android development. You can start with the Android Hello World Tutorial.
Comments on "Android Development Environment Setup"
Comments are closed for "Android Development Environment Setup".


Wonderful, short simple and sweet.
very nice useul for me…
sir, but now we can download adt bundle from google, there is no set up
Thanks Gopal.
1. The SDK tools for Eclipse provided for download is an exe.
2. ADT plugin for Eclipse, need not be downloaded, just install it from within Eclipse.
Nice explanation and very easy to understand..
1. Can u explain about the websockets
if possible simple example using tomcat native API
Thanks joe. As you said, world is going android way. We need to cope up with latest technologies everyday.
Thanks Rajashekhar.
Sure will try to write on them soon.
Yes Rakesh. Nowadays, technology keeps changing rapidly and we have to be on our toes.
Have you used Google’s Android Studio? Can you write a post on Android Studio?
Excellent Training…….Thanx
Welcome Ghazanfar.
Hi, can you please explain me the Constructor, and difference between Abstract and interface with internal code working.
Hi Joe, I wanted to learn andriod and this is what I was looking for. Nice Article. Keep posting.
nice